


Table of contents
Checking security or managing API Endpoints daily and keeping track of them manually can be a daunting task, especially for businesses with large volumes of API's. Fortunately, here is the best tool which can solve your all problem and provide you with a one-stop solution. I'm talking about Akto. It is one of the best tool to test or manage API endpoints and it provides lots of customizations as per your needs. In this article, we will discuss how to create an automated inventory using Akto.

Hold on 😒
Akto is an open-source, lightweight platform that can be used to automate various aspects of a business, including inventory management. It can be easily installed using Docker, which makes it even more convenient for businesses that don't have a lot of technical resources.
Firstly, you need to set up Akto on your machine. Now, you are thinking about how should I set up 💭. Refer to the guide - https://github.com/akto-api-security/akto
I used docker to set up Akto on my local machine!! 😐
When you successfully setup, it looks like this ➡️


So, let's move on next step quickly 🏃🏻♂️ -
Click on the API Inventory in the Observe.
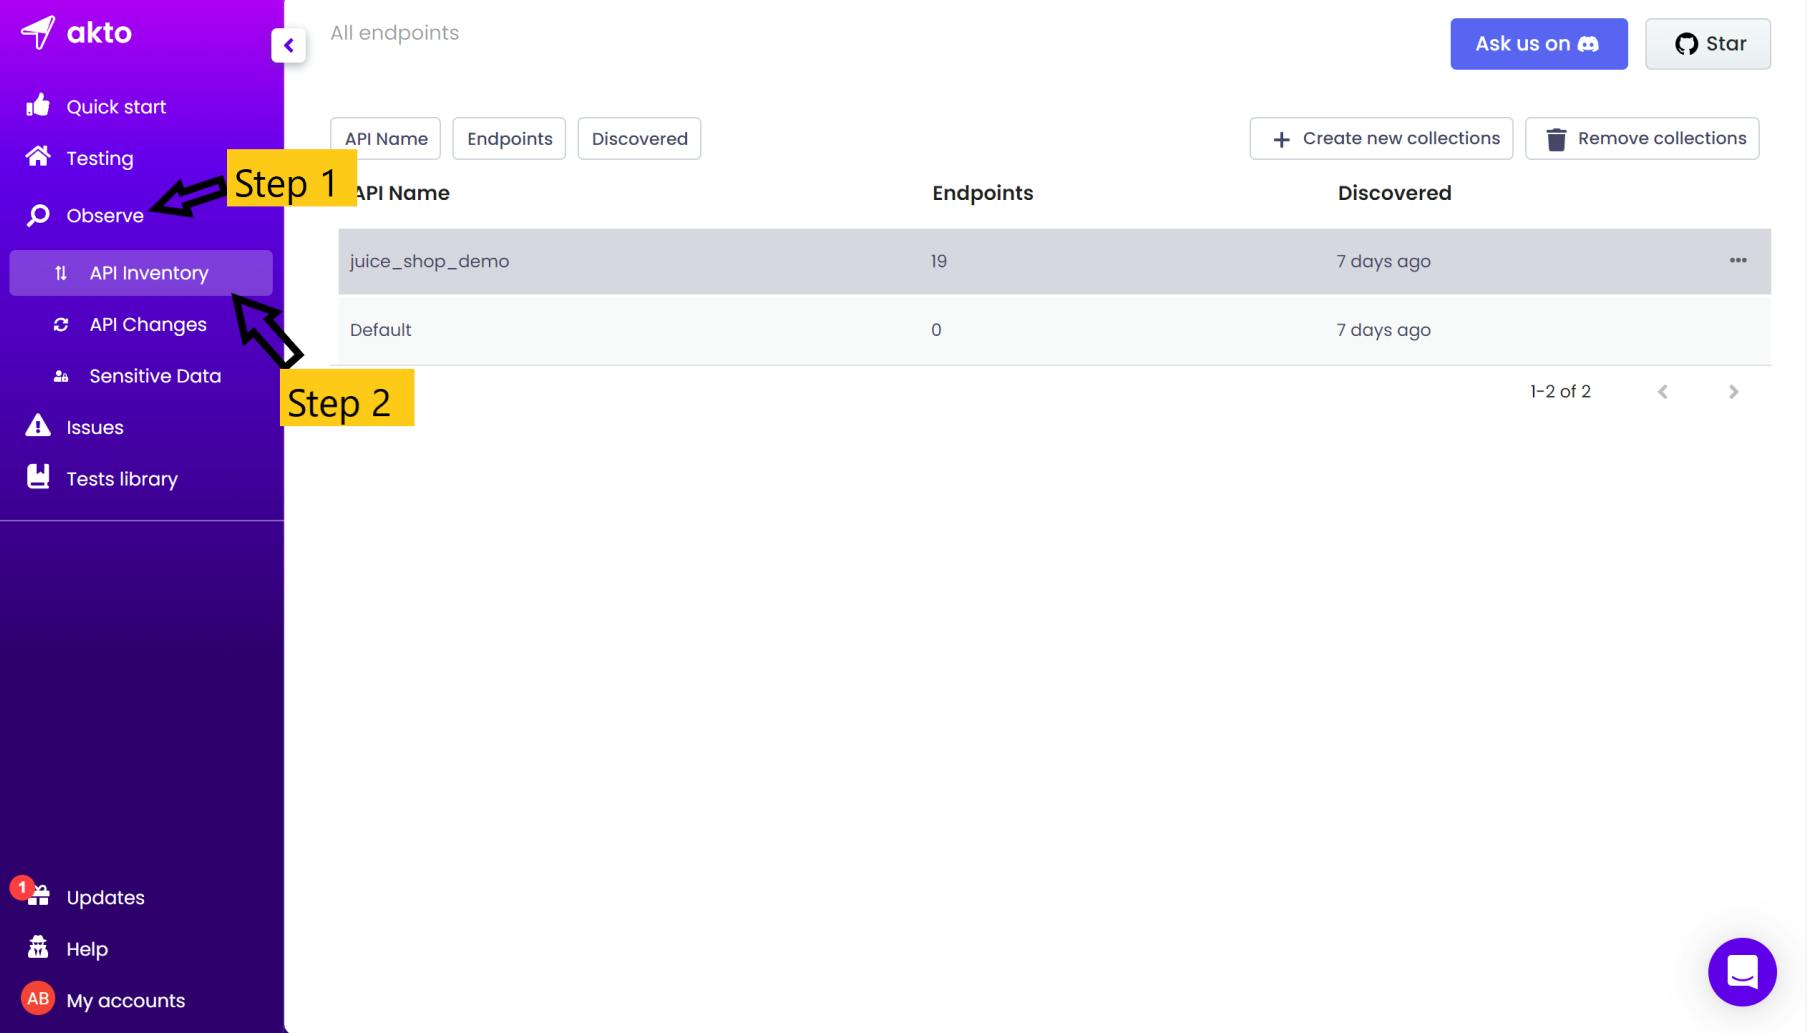
Now, you have a similar screen as mine. There are 2 collections already present in it. One is juice_shop_demo (from the onboarding tutorial). The second is the default.
Click on ➕Create new collections in the upper right side. After clicking enter the name of your collection and hit enter. If you do it correctly then you saw something like that ⬇️. [Test_Akto]

Click on the collection you just created. You reach a new world where everything is zero 😒.

It's zero like my parents said to me -

Now you need something but what 🤔, you need API Endpoints to monitor.
You can add endpoints by importing API traffic using Akto's burp suite plug-in, Integrating Postman with Akto or uploading .har file.
Let's do it -
Click on the highlighted arrow on the above image in the upper right corner to upload the
.harfile.
Here, I uploaded
.harfile which contains captured API traffic of google.com. 🙃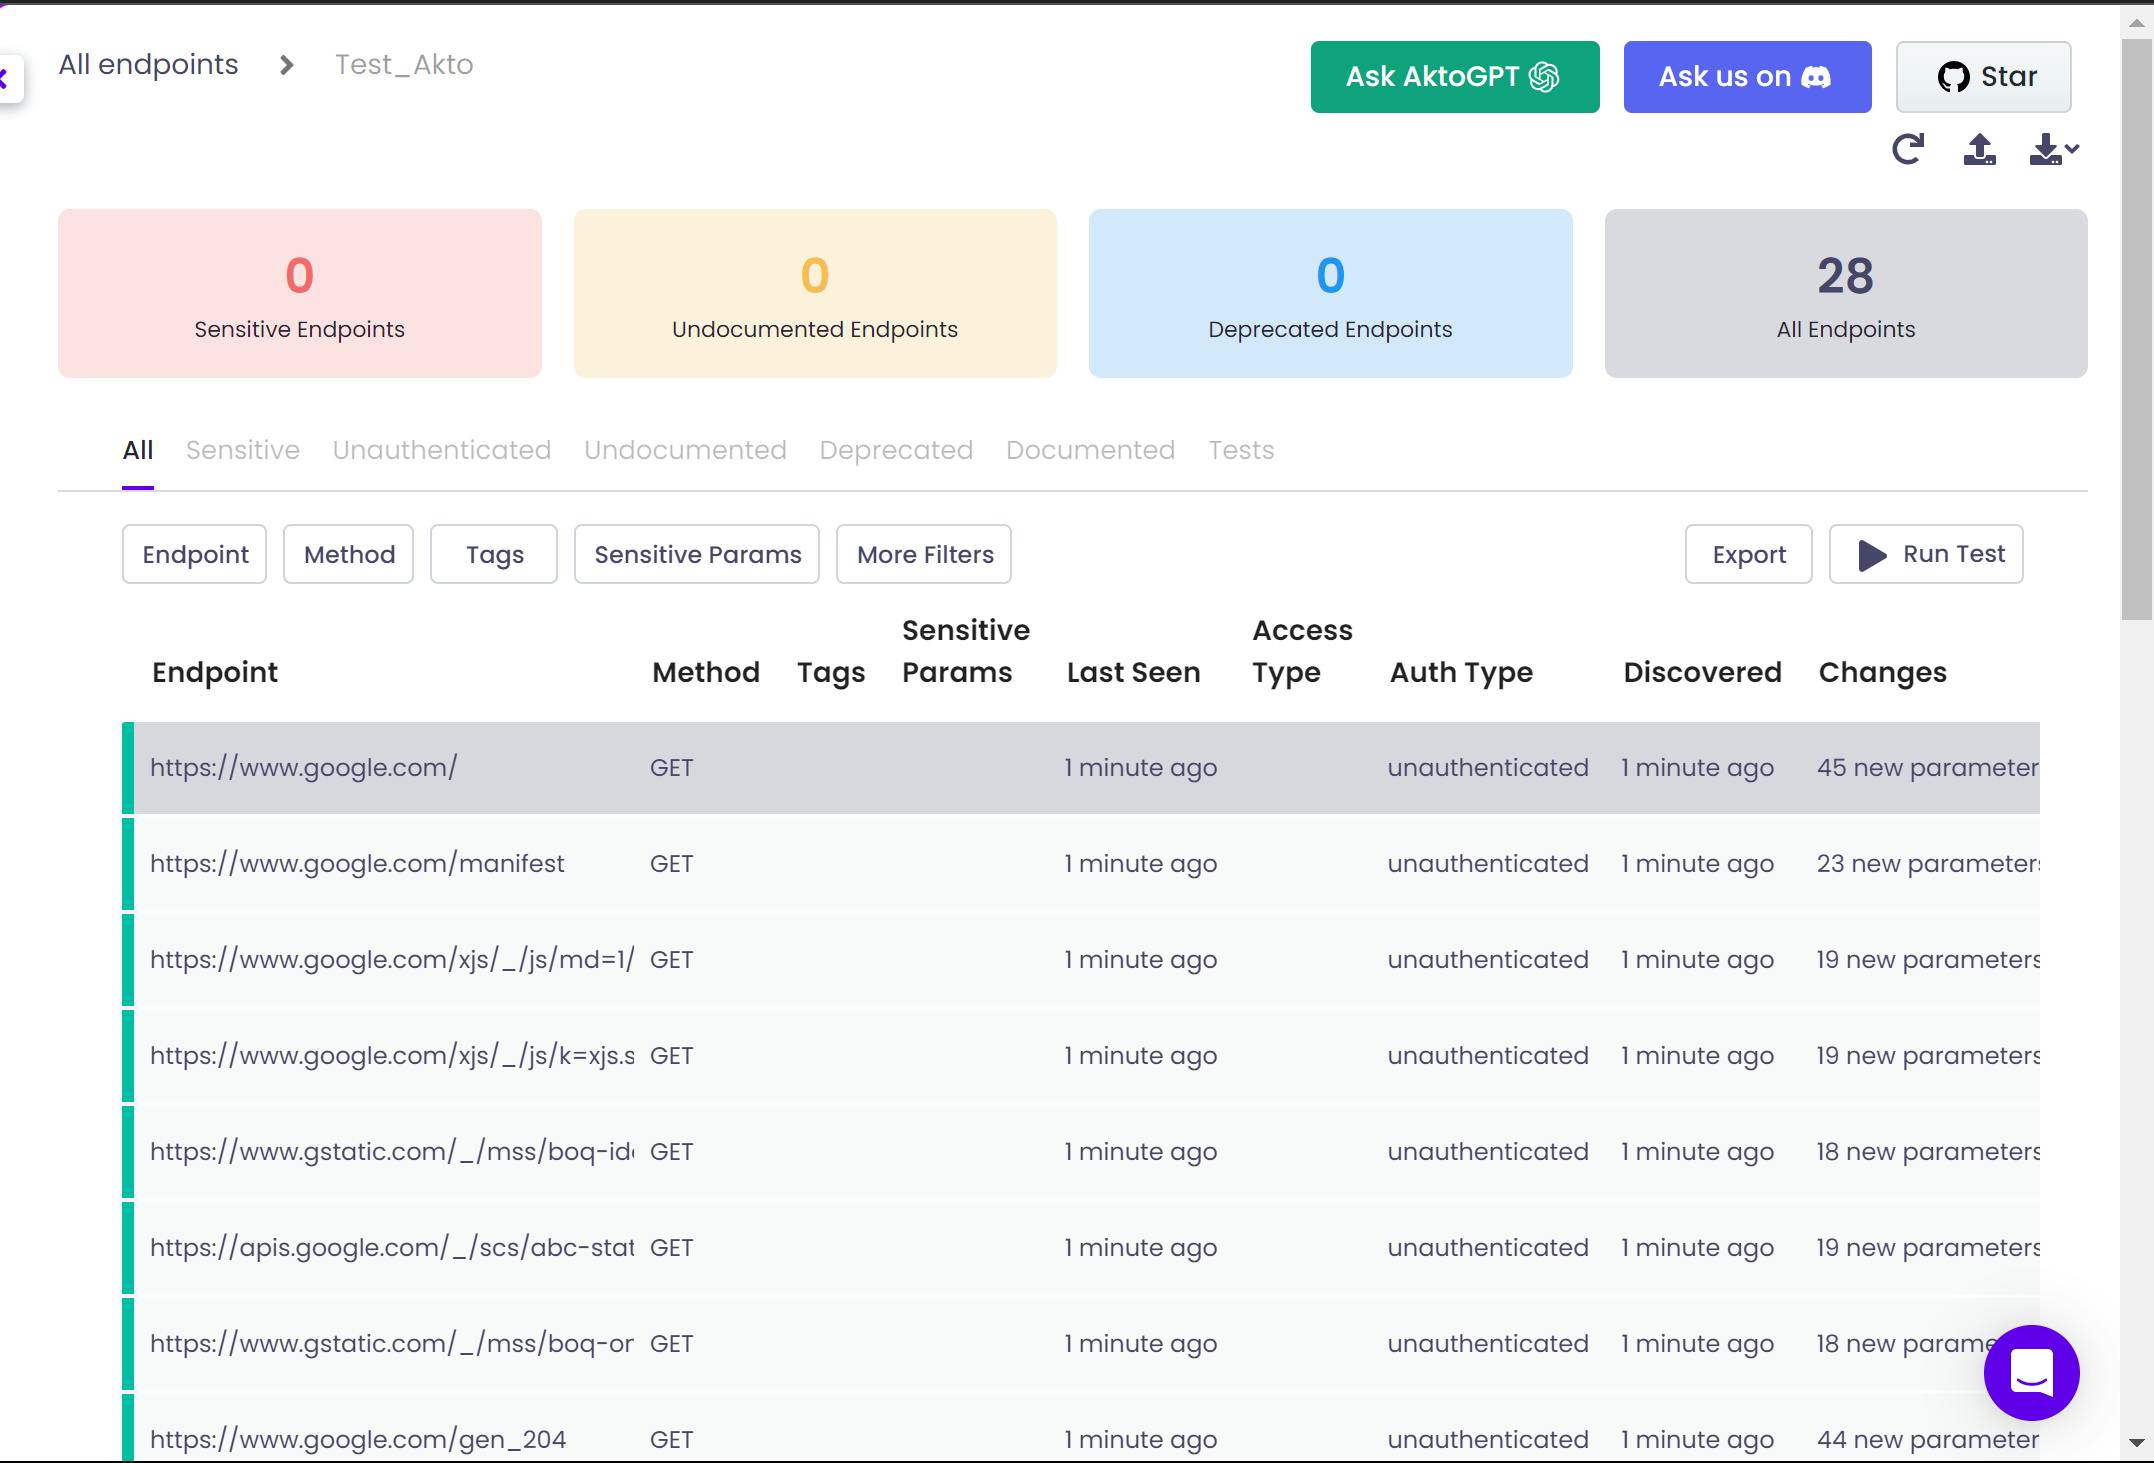
Now, Click on the
▶️ Run Testbutton in the upper right corner.
After clicking 💣
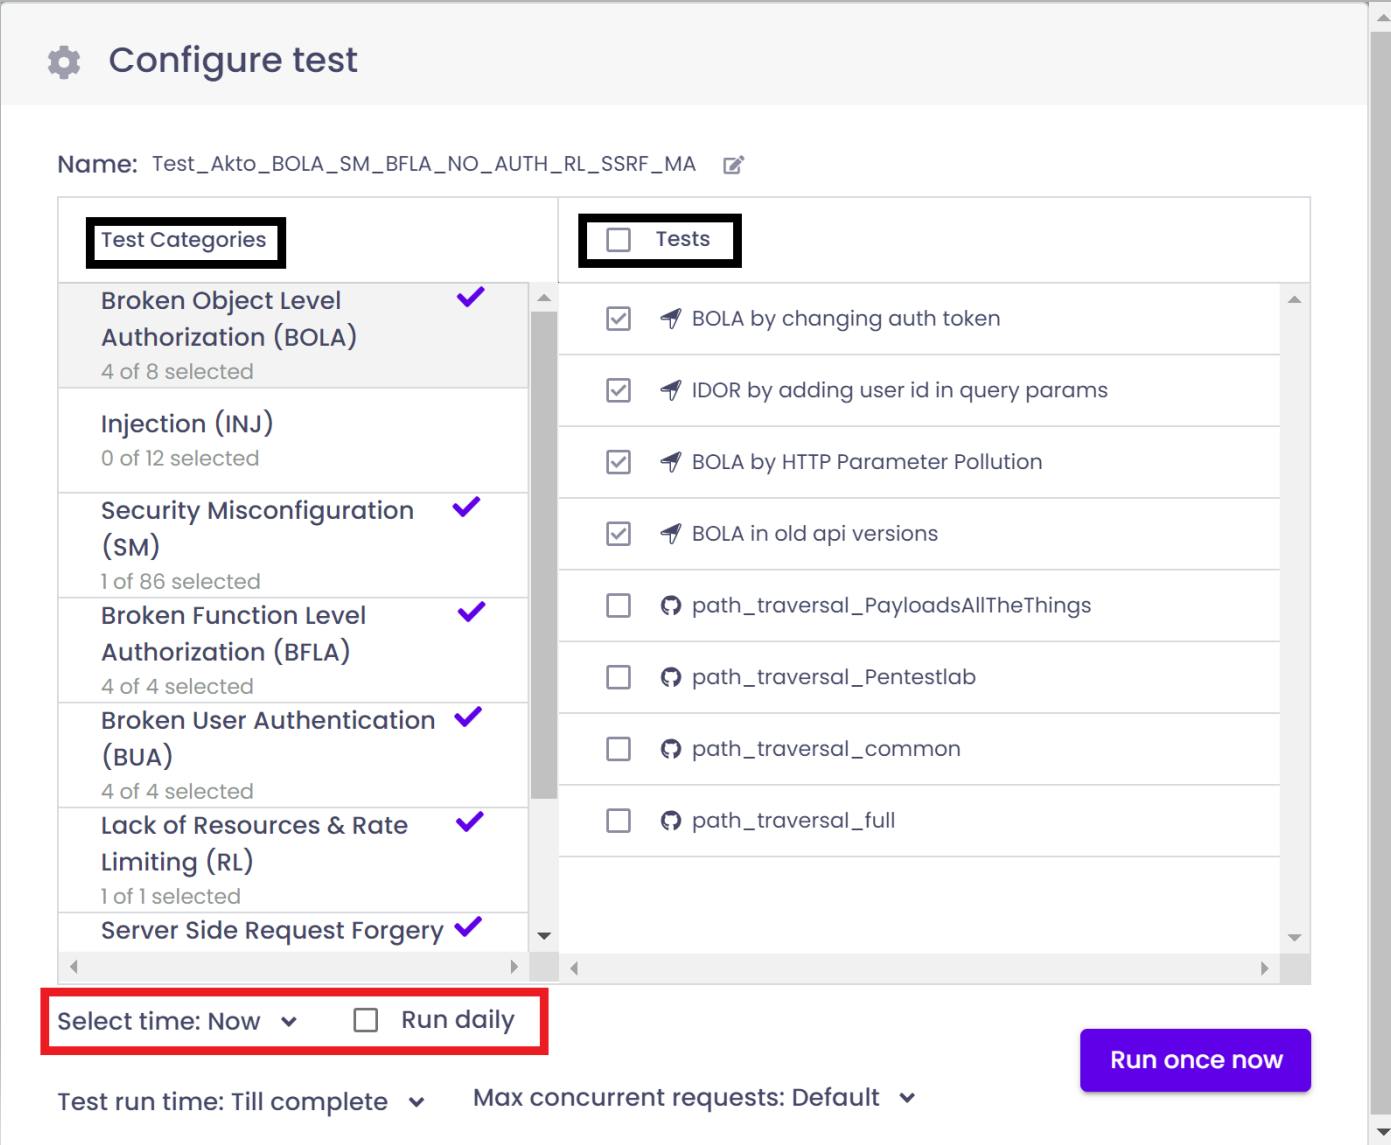
You landed on the Configuration box 🛬. Here you can choose which tests you want to run and select test categories also. But the thing highlighted in the red box is what we need.
Select the time from the drop-down menu on which you want to run the test.
Check the
⏹️ Run dailybox.
Now, click on the
Run daily at x am☀️.
All done!! 👾
You created an automated inventory using Akto. You can check the scheduled test on -

Now, all task is done. Akto will run all the tests at the scheduled time automatically and create a report of it and send you a notification if anything suspicious after running the test.
So, today you learnt about creating inventory and automating it using AKTO.
You can refer to the docs for more details.